


In this article, I'm gonna discuss How to configure your gmail account for sending emails in node.js using nodemailer & oAuth2.
Previously, we had an option for sending emails in node.js via gmail by allowing less secure apps in your gmail settings, but now google has removed that feature for security reasons and so we have to go through several steps to send emails from your official Gmail account.
Let's get started!
Set up your project
Go to Google Developer console and create a new project
Configure oAuth consent screen
Select your project
Go to API & Services tab
Select oAuth consent screen from the dropdown
Select external and then hit create
Enter all the details carefully, then click save and continue
In scops, click save and continue
In Test users, enter your email address which you would like to use for sending emails
Create credentials for your project
Click on credentials in the side menu
Click on create credentials
Select oAuth client ID from the dropdown
Select your application type
Scroll down to Authorised redirect URIs & add this URI developers.google.com/oauthplayground
Copy and save your client ID & client secret
Get the refresh and access token
On the top-right corner, click the settings icon
Mark Use your own OAuth credentials
Enter the Client ID & Secret we've copied before
Now, in the left side, scroll down and select Gmail API v1
Select mail.google.com
Click on Authoirse APIs
Select your account (which you've added as Test user in the Google developer console)
Now, click on Exchange authorise code for tokens
Copy and save refresh & access token
Set up Nodemailer & Send your first email
First of all you will have to create a **.**env. And this file should include the following
USER_EMAIL: the email you have used in your google configuration
USER_PASS: the password of your email id
CLIENT_ID: it's the same client-id that we've got on the google developer console
CLIENT_SECRET: it's the same client-secret that we've got on google developer console
REFRESH_TOKEN: this is the refresh token we've generated on oAuth2 playground
ACCESS_TOKEN: this is the access token we've generated on oAuth2 playground
Let's install all important modules
npm install nodemailer gooogleapis dotenvnodemailer is the module for sending email node.js, googleapis would be used for setting google account, and the dotenv module is just to make use of your environment variables
Now, add the modules to your main file
 require("dotenv").config()
 const nodemailer = require("nodemailer");
 const { google } = require("googleapis");
 const OAuth2 = google.auth.OAuth2;
Let's create the Transport function
 const createTransporter = async () => {
   try {
     const oauth2Client = new OAuth2(
         process.env.CLIENT_ID,
         process.env.CLIENT_SECRET,
         "https://developers.google.com/oauthplayground"
       );

       oauth2Client.setCredentials({
         refresh_token: process.env.REFRESH_TOKEN,
       });

       const accessToken = await new Promise((resolve, reject) => {
         oauth2Client.getAccessToken((err, token) => {
           if (err) {
             console.log("*ERR: ", err)
             reject();
           }
           resolve(token);
         });
       });

       const transporter = nodemailer.createTransport({
         service: "gmail",
         auth: {
           type: "OAuth2",
           user: process.env.USER_EMAIL,
           accessToken,
           clientId: process.env.CLIENT_ID,
           clientSecret: process.env.CLIENT_SECRET,
           refreshToken: process.env.REFRESH_TOKEN,
         },
       });
       return transporter;
   } catch (err) {
     return err
   }
 };
This function is to get ready your google account for sending emails
Now let's create our main function to send emails
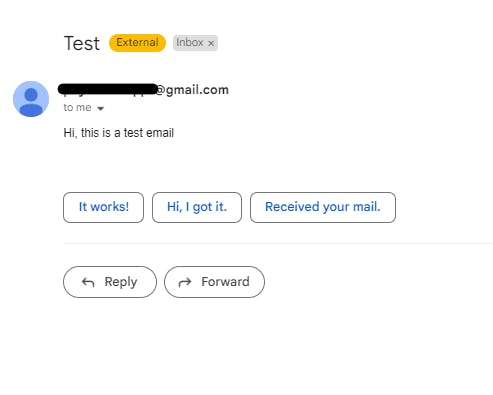
 const sendMail = async () => {
   try {
     const mailOptions = {
       from: process.env.USER_EMAIL,
       to: req.body.email,
       subject: "Test",
       text: "Hi, this is a test email",
     }

     let emailTransporter = await createTransporter();
     await emailTransporter.sendMail(mailOptions);
   } catch (err) {
     console.log("ERROR: ", err)
   }
 };
Now let's call our function
sendEmail()Bingo! time to check your email!
Conclusion
In this article, we've studied how to send emails in node.js with nodemailer and googleapis.
Thanks for reading.